|
The EVERYWHERE App is an iOS and Android smartphone application purpose built for enterprise and government entities with employees on the go.
The App operates in standalone mode in Wi-Fi or cellular environments, or it may be paired via Bluetooth with the EC-100 or inReach device to provide global connectivity and communications. When paired with an EC-100 or inReach, the App extends communication and tracking globally. It can also be used to update configuration settings and to create the personality of the paired EC-100. |
|
Introduction
The App provides both individual and team situational awareness via a mapping overlay. In addition, the App provides secure text messages with team members. Users in distress can activate a two-step SOS to summon emergency assistance and, when SOS is declared, team members are notified of the user in distress.
Users can send messages to one or more team members, view individual and team tracking data, obtain information on device status, and remotely configure specific devices. In emergency situations, user can easily identify their closest assets and deploy them efficiently.
In conjunction with the EVERYWHERE Hub, the App supports EVERYWHERE’s Intelligent Routing platform, leveraging the most efficient network for communications back to the EVERYWHERE Hub, providing always connected communications.
Installation

|

|
Using an internet or cellular connection, download and install the EVERYWHERE App from the Google Play Store or the Apple App Store. During install, follow the prompts, allow all requested access and accept the licensing agreement.
Note: The EVERYWHERE App works on a wide variety of Android and iOS phones. The App supports all Android devices running version 6.0 and later and supports all iPhones running iOS version 10.0 and later.
Note: The EVERYWHERE App works on a wide variety of Android and iOS phones. The App supports all Android devices running version 6.0 and later and supports all iPhones running iOS version 10.0 and later.
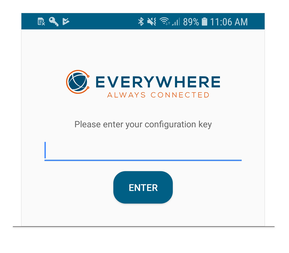
During app install you will be required to enter your EVERYWHERE App configuration key. Contact your EVERYWHERE System Administrator to receive your Apps’ unique key.
Set Permissions Allow Access to the App
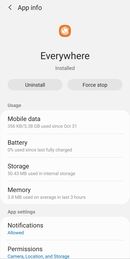
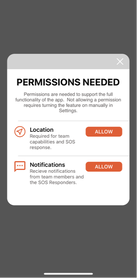
The App will prompt you for access to your phone’s various resources such as notifications, location, camera, microphone and storage. To make full use of the EVERYWHERE App, provide access to all the resources the App prompts you for.
If for some reason you need to make access available to a resource you denied, ensure the following settings and permissions are set:
|
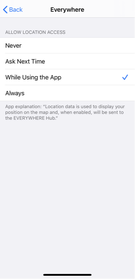
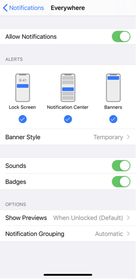
Android
iOS
|
|

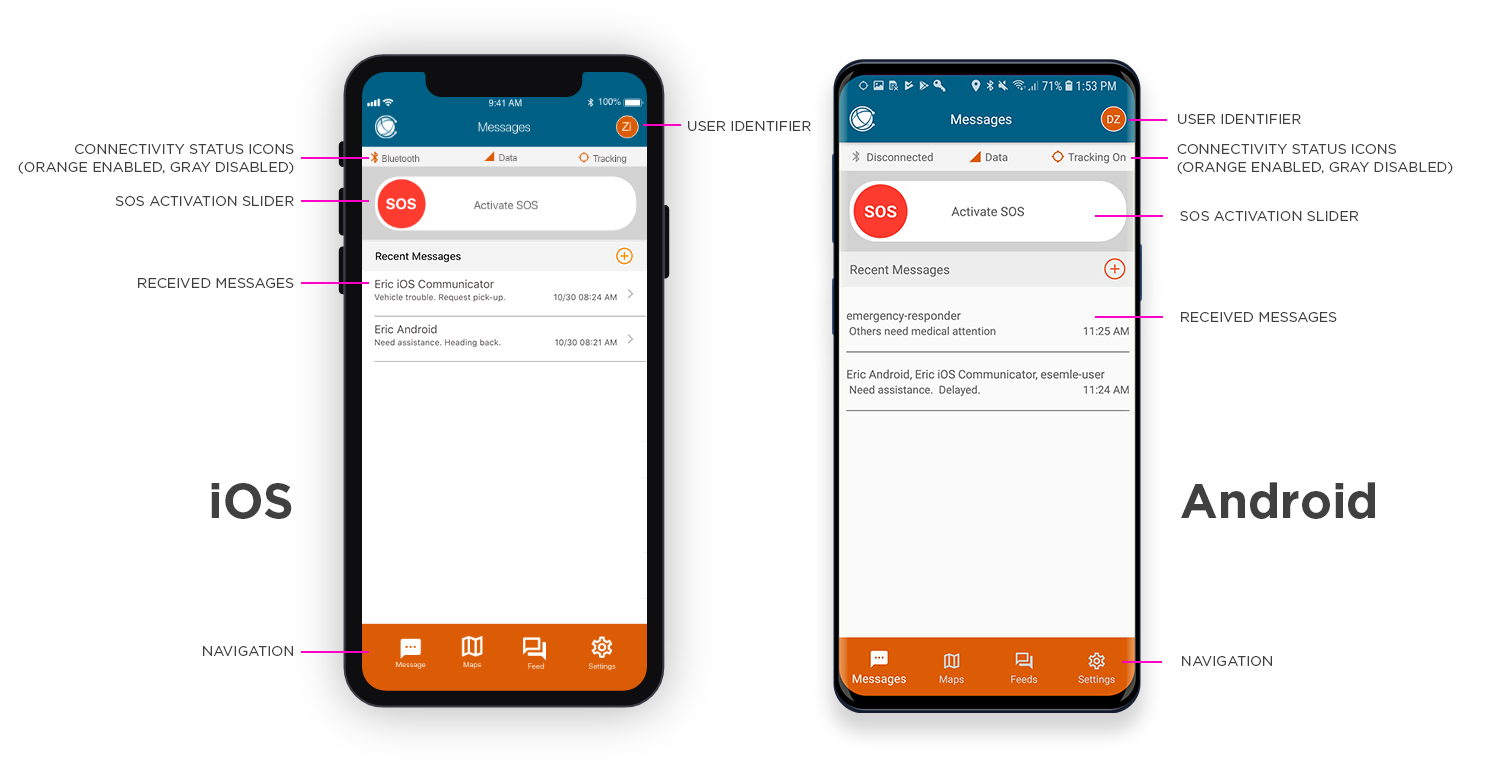
Messages Screen
Activating & Canceling SOS
IMPORTANT: USE SOS ONLY IN AN EMERGENCY. SOS MODE SHOULD ONLY BE USED DURING LIFE THREATENING EMERGENCIES.
SENDING FALSE SOS MESSAGES MAY SUBJECT YOU TO LIABILITY FOR ADDITIONAL CHARGES.
SENDING FALSE SOS MESSAGES MAY SUBJECT YOU TO LIABILITY FOR ADDITIONAL CHARGES.
Activate SOS mode to begin communicating and sending alerts directly to EVERYWHERE’s SOS Monitoring Center. The SOS Monitoring Center will notify the appropriate emergency responders based on your GPS location and your emergency situation. Responders may include local police, Coast Guard, or Search and Rescue teams. Please note that you may be liable for expenses related to your rescue.
Once SOS is initiated by sliding the SOS button to the right, the App will continuously send the SOS Monitoring Center your GPS position every minute until the SOS is canceled or the device is powered off. While SOS is active, your phone should maintain Wi-Fi, cellular or other network connectivity.
Once SOS is initiated by sliding the SOS button to the right, the App will continuously send the SOS Monitoring Center your GPS position every minute until the SOS is canceled or the device is powered off. While SOS is active, your phone should maintain Wi-Fi, cellular or other network connectivity.
|
Activating SOS: Slide the SOS slider from left to right. To reduce the risk of an accidental SOS activation, the user will be asked to activate or cancel the SOS request. Tap "Cancel" to return to the previous screen. Tap "Activate SOS" to confirm the SOS and begin communicating with the SOS Monitoring Center. Once activated, the SOS slider will appear on every page in red.
Deactivating SOS: Slide the SOS slider from right to left. You will be asked to deactivate or cancel the deactivate SOS request. Watch this video to see SOS activation and deactivation. |
|
Notification of a Team Member's SOS Message
|
When a team member's device enters or exits an SOS, a notification is automatically sent to all other team members. Team members can acknowledge, view the person's location or message the user.
Team members will also be notified when a user exits SOS emergency mode. Acknowledgement of the notification assures the distressed user that someone on their team has seen the cancellation. |
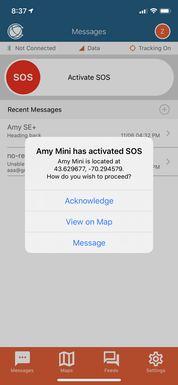
Entering SOS notification
|
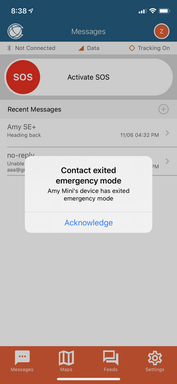
Exiting SOS Notification
|
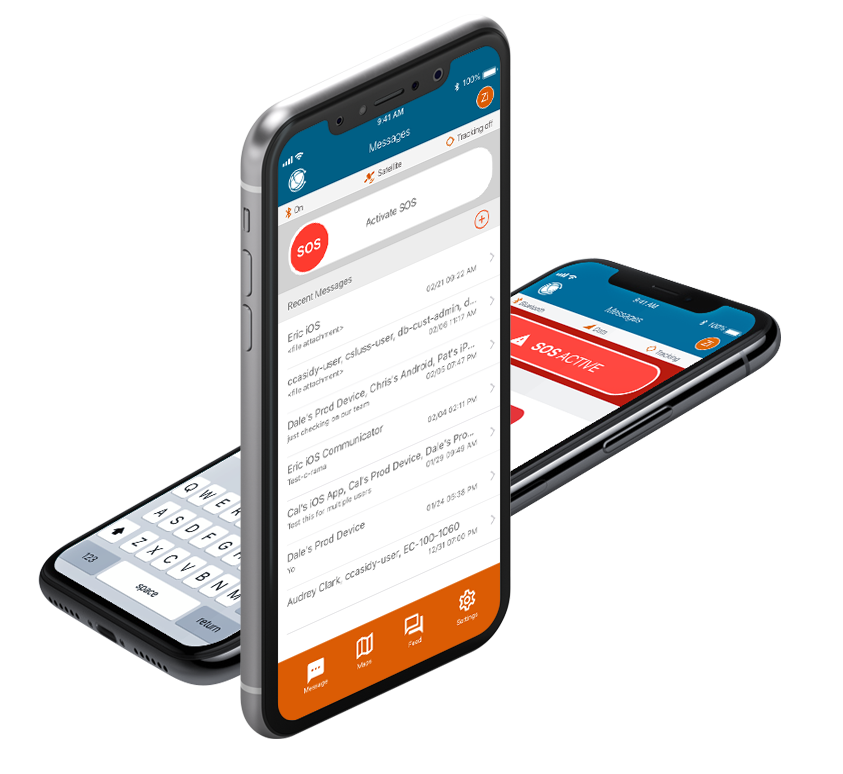
Compose Messages
The default landing and home screen of the App is the Messages screen. From here, users can activate or deactivate SOS, view recent or create new secure chat messages with team members.
|
To create a new message, tap the (+) in the upper right of the screen, select the team member(s) to whom you want to send the message, tap "Create" in the top right and begin typing. Or, tap the quick messages to instantly add commonly-used phrases. Tap the blue up arrow to send the message.
New chat message - team member icons – Each user type is identified by an icon that illustrates the device or platform of the team member. This icon is also used in conjunction with the user name in Maps to identify a device type.
|
Watch this video to see how to compose a new chat message. |


|
Quick Messages are pre-formatted messages users can quickly select, without typing and send to team members. A scrollable selection of quick messages is located at the bottom of the chat screen. A single tap adds the phrase to your chat, a double tap selects and then sends to your selected team member.

Quick Messages
|
|
Maps
The App provides both individual and team situational awareness via the Maps feature. In emergency situations, you can easily identify your closest assets and deploy or communicate with them efficiently.
Maps provides a real-time view of resources for a complete picture of team deployment. Team icons provide at-a-glance visual indicators to confirm a resources location, provide distance information and provides the ability to quickly and easily message / communicate with team members either individually or as a group.
Maps provides a real-time view of resources for a complete picture of team deployment. Team icons provide at-a-glance visual indicators to confirm a resources location, provide distance information and provides the ability to quickly and easily message / communicate with team members either individually or as a group.
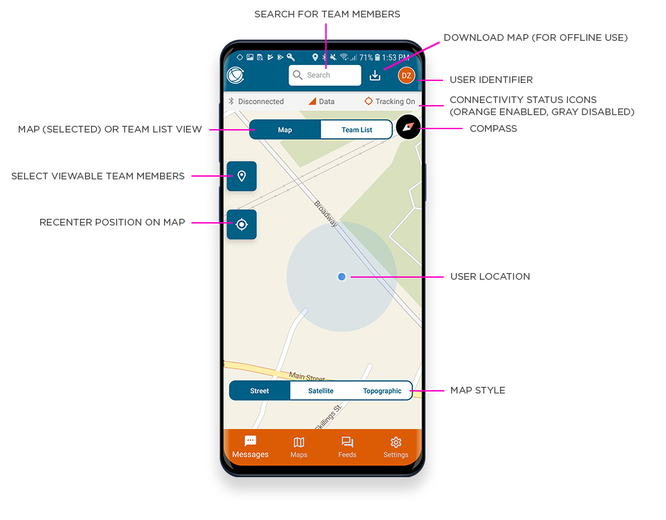
Map View
|
The default Map screen geolocates you or your teammates in Street view and defaults to the Map(s) Tab. To view you or your teammates in Satellite or Topographic view, tap the corresponding Tab.
The Team List Tab provides information on and access to the location of your teammates. Note: A red icon indicates the teammate is in SOS. To see the range and bearing to teammates: Option 1: On the Map screen, click on the icon of your teammate. The App will display the teammate’s name. Tap on the name, and the App will display the range and bearing to that individual. Option 2: Alternatively, select List from the Map screen, and the App will display the range and bearing to all of your selected teammates. Tip: You can message a teammate from the range and bearing info window. Tap Message to send a message. |
|
|
View a Map Offline – Activity Management You can store maps and other information for offline access at a later time. Tap the offline storage download icon. A confirmation window appears. Tap Ok to save and store the map locally on your device or Cancel to cancel. |
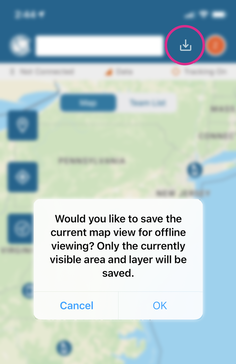
Download Current Map View
|
Feeds
|
Feeds is an efficient way to share information with all team members. Users can post geotagged texts, photos and audio clips with the ability for other users to reply or acknowledge. Feeds is EVERYWHERE's solution to disseminate information quickly in an out of emergencies.
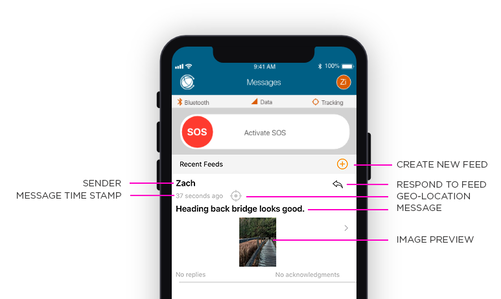
Feeds Details
|
|
Pairing with EVERYWHERE Satellite Communicators

INREACH SE+, INREACH MINI, EVERYWHERE EC-100
|
In locations where maintaining a cellular or Wi-Fi connection is not possible, you can pair your smartphone with EVERYWHERE satellite communicators for global connectivity.
When paired with the EC-100 or EVERYWHERE inReach communicator, the App is able to send its data over an Iridium satellite connection just as it would from a cellular or Wi-Fi connection on the phone. |
|
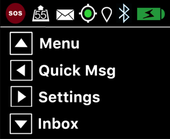
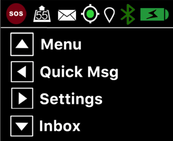
EC-100 Pairing Overview
Use the arrow keys on the keypad to navigate through the menus in the display. When prompted, confirm a selection by pressing the OK key in the center of the keypad. To pair the EC-100 with a smartphone for use with the EVERYWHERE App: Step 1 – Ensure the EC-100 has Bluetooth turned On. Note: When Bluetooth is off, the Bluetooth icon is missing from the EC-100 Status Bar. When Bluetooth is turned on, a white icon will appear, when synced the icon is green. From the EC-100 Main Screen: 1. Press the Right Arrow key to launch Settings. 2. From the Settings menu, scroll to Bluetooth and press OK. The Enable Bluetooth Menu is displayed. Use the arrow keys to scroll to until ON is highlighted. 3. Press the OK key. After a few seconds the device will return to the Main Screen where the Bluetooth icon will now be in green indicating a successful pairing.
|

|